CSCI 150: Lab 1
Hello, World!
Due: 11:59 PM on Tuesday, Februrary 16
In this lab you will be learning how to create Python programs using repl.it. At the end of this lab you should be able to:
- Log into repl.it
- Create our first Python programs and run them
- Learn how to get input from the user
- Use the command line to run our programs
The lab is broken up into sections to make things more manageable. Every section indicates how many points it is worth. Be sure to read each section carefully. With the exception of the first one, most labs are expected to take a while (7-9 hours is typical). Get as far as you can in the scheduled lab time, and try to work steadily on the lab throughout the week. Don't leave it all to the day the lab is due.
A reminder about the Honor Code - While you are encouraged to discuss the labs with each other, you should never copy anyone's code, and no one else should ever have a copy of your code. If you do discuss the lab with someone else, or look up resources online, please write that you did so in the comments at the top of your related program. On partner assignments, you may work with a single partner, but no one else. Again, it is fine to discuss the lab with others, but you should never copy their code directly.
Part 1 - Setup and the Command Line
0 points
To use these labs, you'll need a repl.it lab account that has been added to our class team. If you did not follow the relevant steps in Lab 00, please go back and do so now. As a friendly reminder, your login will be your Oberlin Google Account.
Starting the Assignment
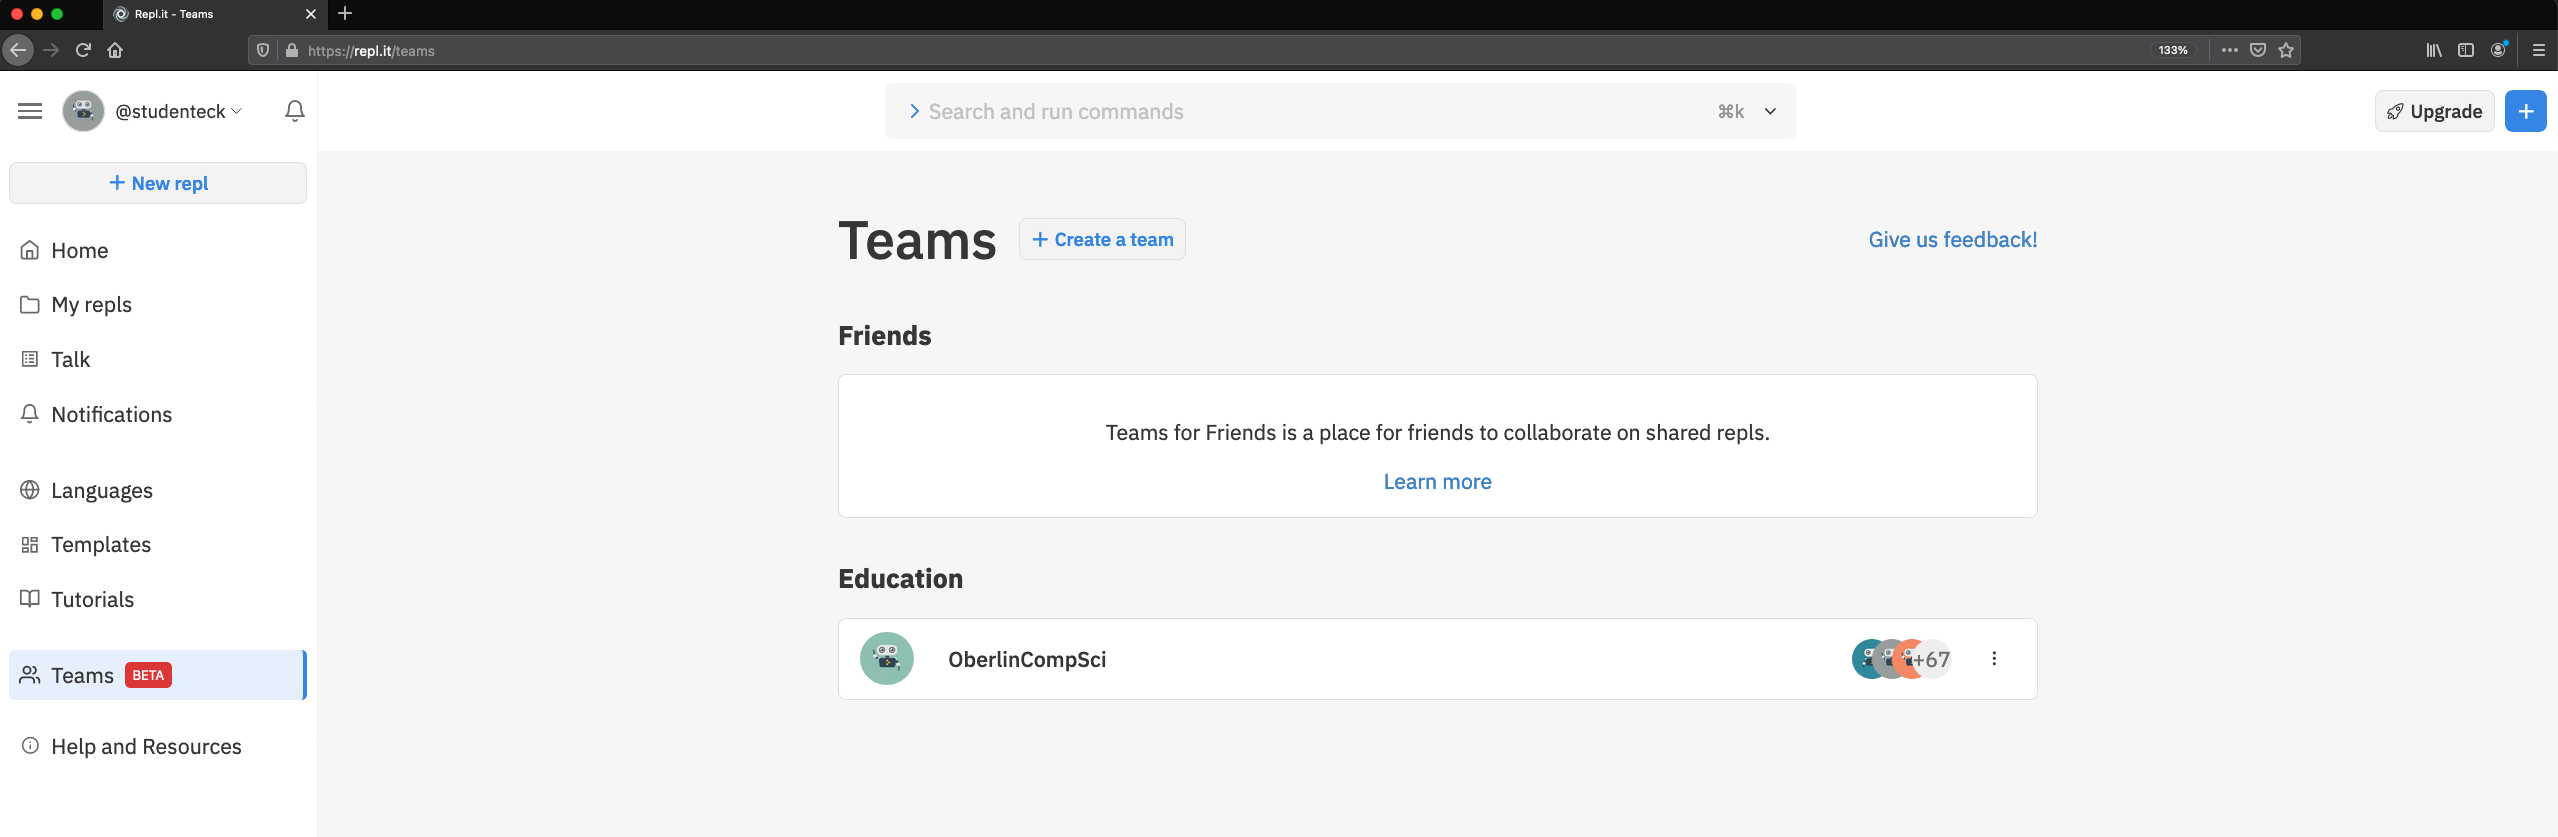
To start the assignment, the first thing we need to do is login to repl.it. If you have been added to the class team, then on the left side of your browser, there should be a "Teams BETA" option. Click on that option, then click on the "OberlinCompSci" team.
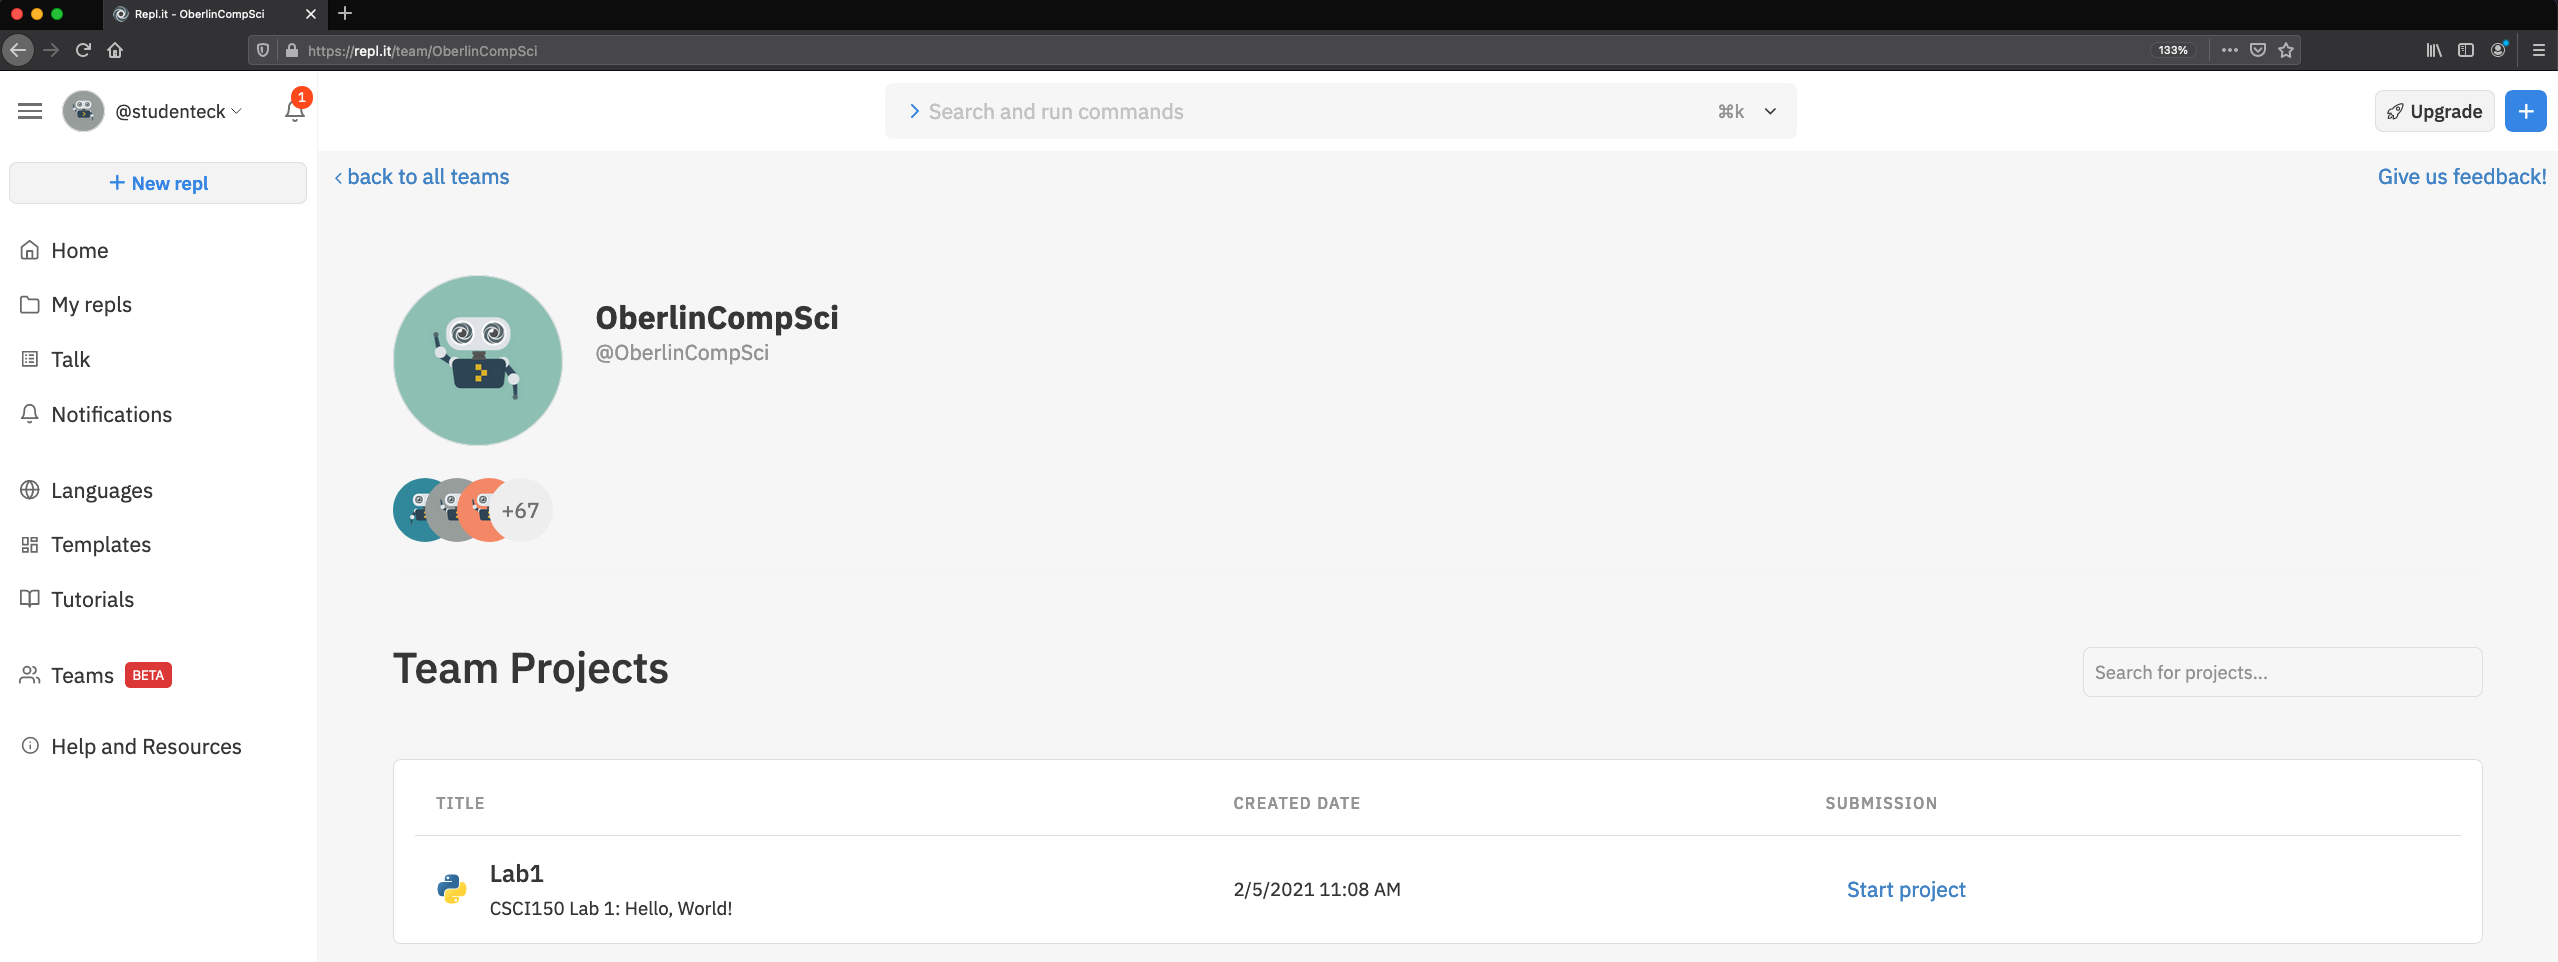
On our class's Team page (OberlinCompSci), you should see a heading called "Team Projects" with a project called "Lab1". To start the assignment, you should click on the "Start project" link in the Lab1 project box. This will create a copy of the assignment that is only accessible to you, in which you can write all of your programs.
Using the Programming Environment
Once you have created your copy of the assignment, you should see a programming environment that is similar to the following:
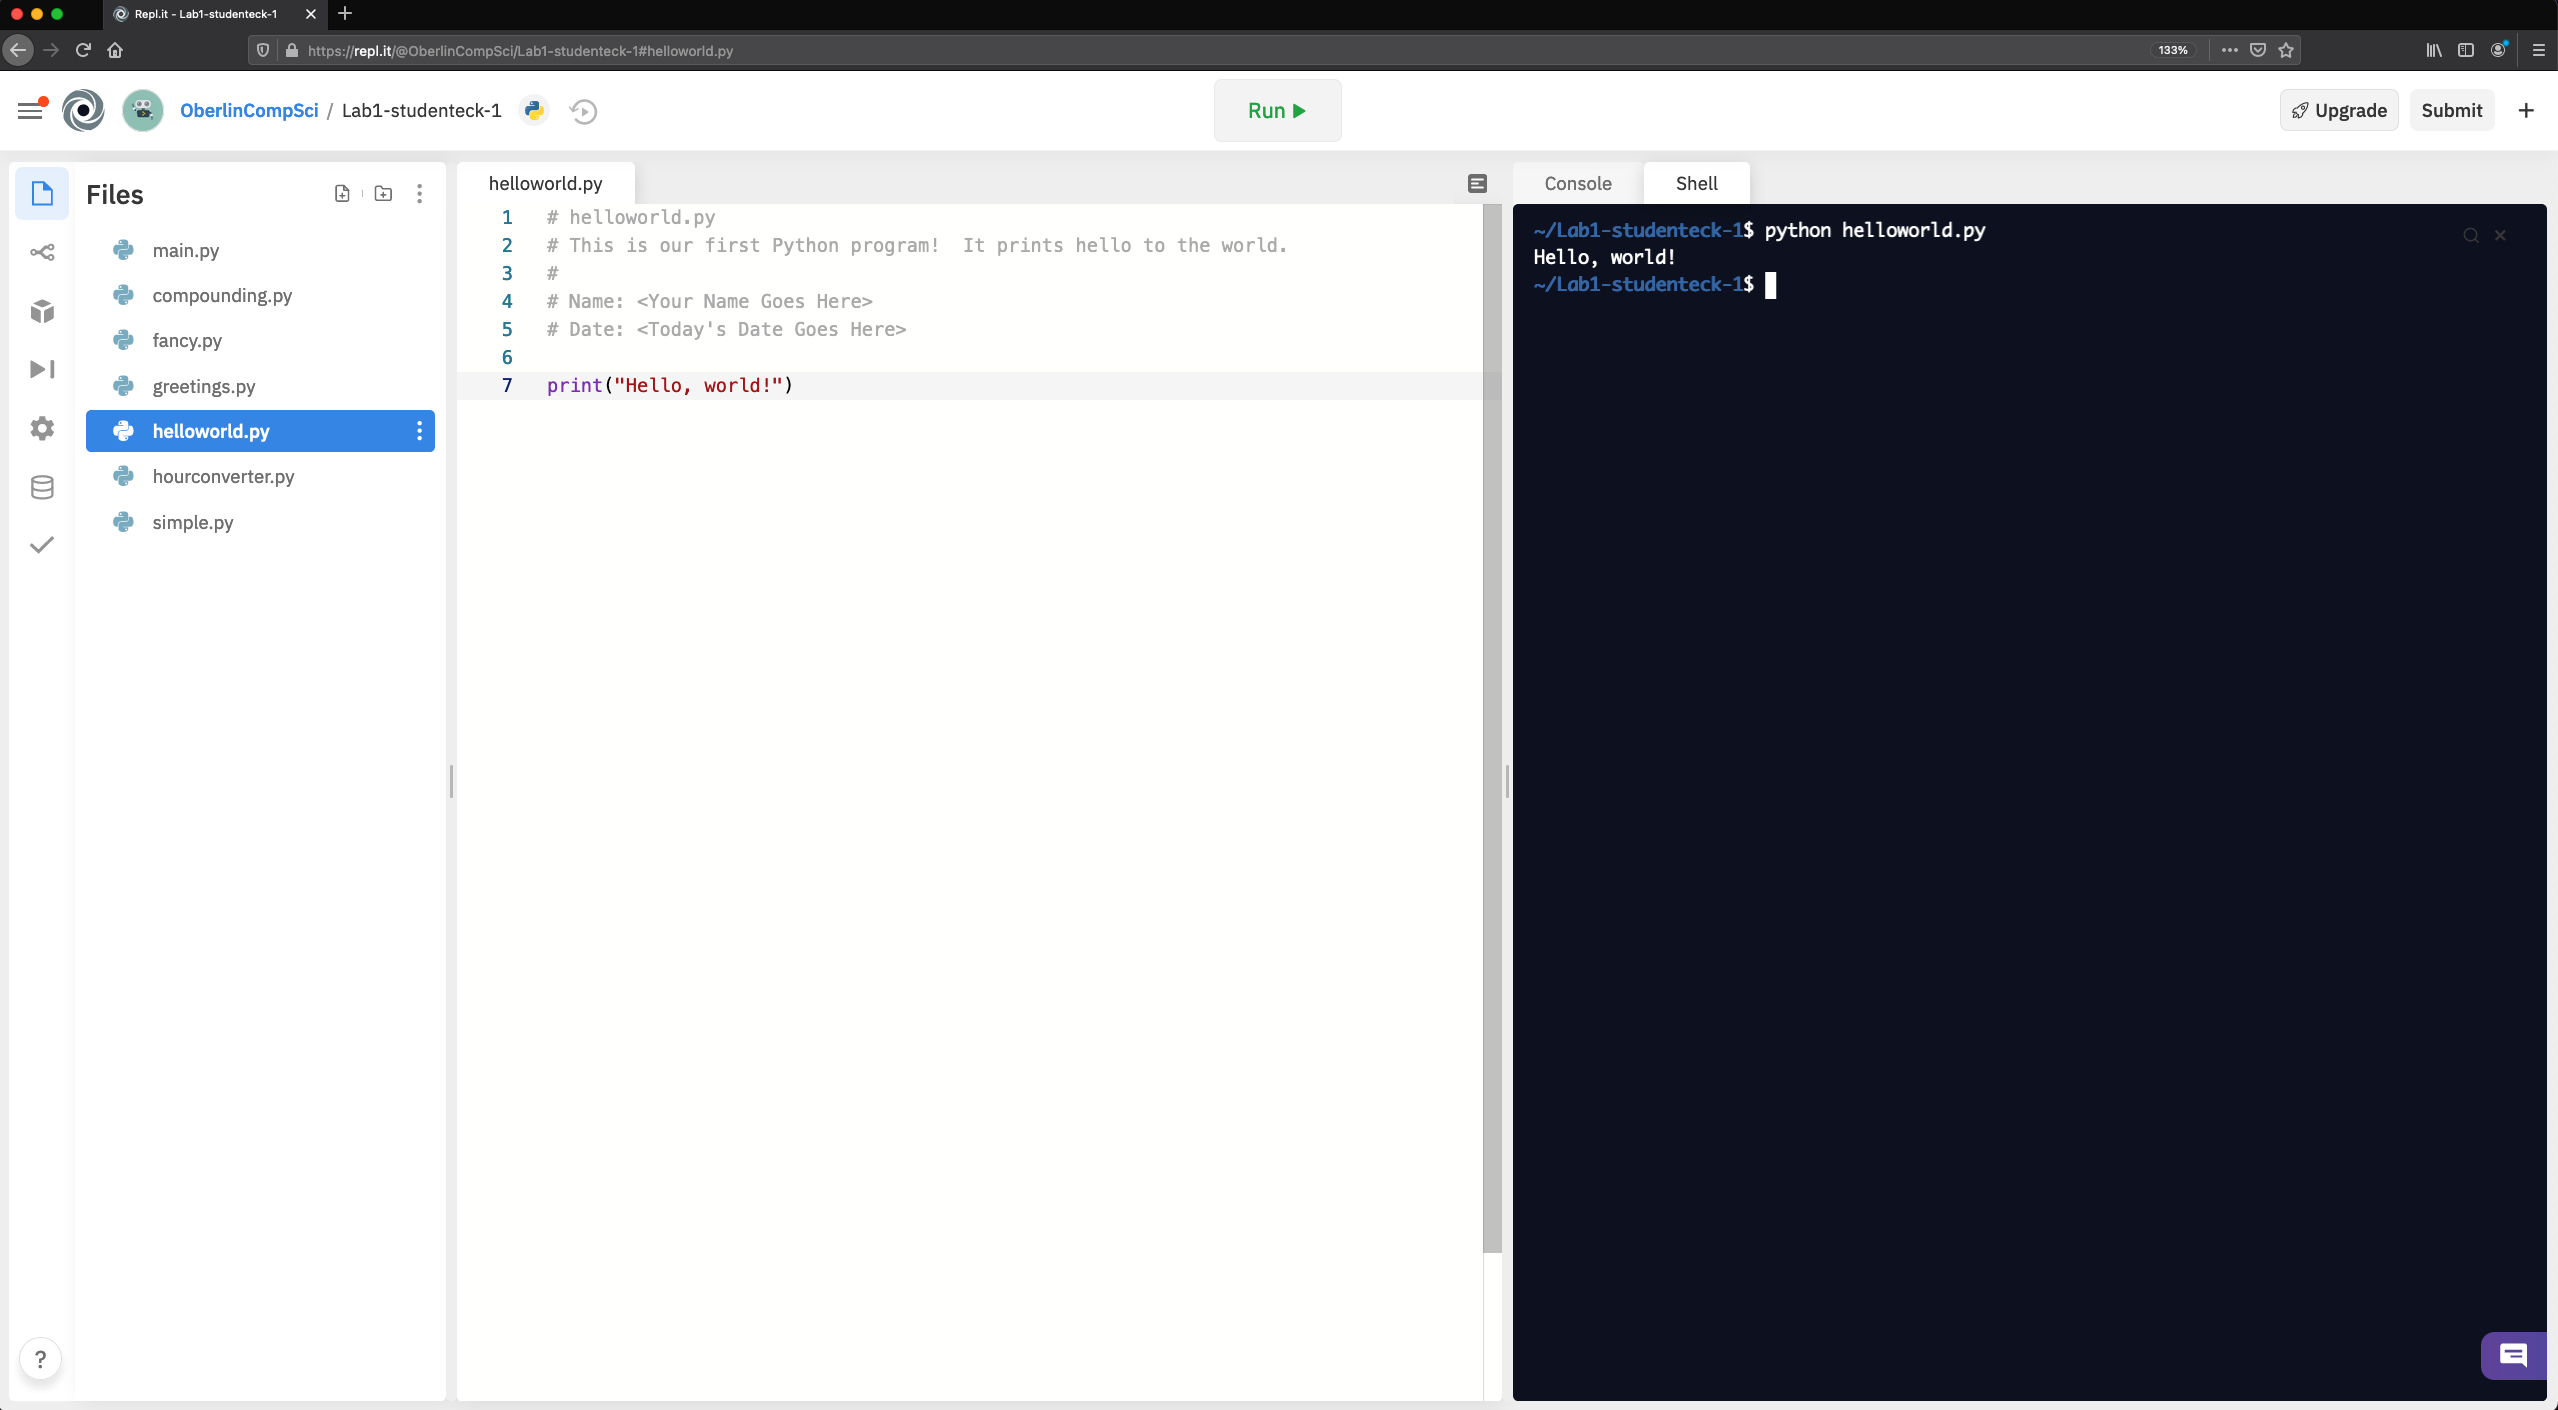
Whenever you come back to an assignment, you should see something like the following picture. The different parts of this software are:
- On the left side is a list of all of the files in the assignment. I have created one for each of the programs you will create during this assignment. repl.it also always adds a main.py, but we will not be using that this semester.
- In the middle of the screen is the code for the current file that you have clicked on. Here, I am working with the helloworld.py program in Part 2 of the assignment. This is where you will do all of your programming.
- In the right of the screen is the command line (also called a shell) where we will run all of our programs. You should select "Shell" here (instead, "Console" is selected by default). To run a program, you should type in
pythonfollowed by the name of the program you want to run. The input and output of your program will all be in this right window.
You do not have to complete your assignment at one time. After closing your browser, you can return to your assignment any time by going to our Team page on repl.it (as described above), then clicking on the "Continue working" link on the lab assignment under "Team Projects". repl.it automatically saves your progress as you work.
Part 2 - Create your first Python program
helloworld.py: 4 points
As your first assignment, you're going to continue a ritual that has been around since the early 1970's -- starting to explore a programming language by first creating a program that prints the words "Hello world!" to the screen. In this course we'll be learning the Python programming language.
In each week's lab assignment, I will start you off with a list of files for each program we will be creating. Those files will be empty, except for some starter comments at the top.
To start your first program, please click on helloworld.py in the "Files" window on the left side of your screen. Then, type in the following:
# helloworld.py
# This is our first Python program!  It prints hello to the world.
#
# Name:
# Date:
print("Hello, World!")
filling in your name and today's date above the line that starts with "print".
Running your Program
To run your program, do not use the "Run" button at the top of the screen. Instead, please type in the following into the command line window (i.e., the Shell) in the right of your program (after the ~/lab1-username$ part):
python helloworld.py
The output
Hello, world!
should appear in the command line window. If everything went as planned, congratulations! You've just edited and executed your first Python program! If there were any error messages, just go back to editing the file and try to make it look like the example above.
Understanding the Program
So what is happening in our (admittedly simple) program? All text that appears after the hash tag (#) is a comment. The repl.it editor colors comments gray. Comments are are ignored by the computer and thus have no effect when the program is run. They are just notes you can leave for yourself and anyone else who ends up reading your code. Making good use of comments is an important skill that we'll talk more about as the course progresses. A standard convention is to have a comment header at the beginning of any program that states the name of the program, its purpose, the author (you), and the date. All your programs should begin this way.
The only actual instruction is a call to the print function. Its purpose is probably evident; it prints whatever is specified within the parentheses. The text is contained within double quotes, which is Python's way of indicating that the text is a literal string of characters, and should be printed just as written (as opposed to a variable or instruction).
You can now experiment with your program. Try changing the contents of the string that is printed, and making a second copy of the print statement. Just be sure to revert to the original working version before you hand it in!
Part 3 - Interacting with the User
greetings.py: 4 points
fancy.py: 8 points
Greetings!
greetings.py will be the first program in which we get input from the user. Start by clicking on the greetings.py file in the left most side of your repl.it editor.
Fill in the comments at the top like you did for your previous program (name, date, etc.). To get input from the user, the first instruction we'll need is the following:
name = input("Enter your name: ")This should be somewhat familiar; it's just an assignment statement. The expression on the right hand side uses a built-in python function called input to get a string from the user. That is, when the program gets to this statement, it will print the statement in the parentheses and wait for the user to type something and hit enter. Whatever the user types before hitting the enter key will be returned and stored in the variable name. After the value is assigned, you should print a greeting with a statement such as
print("So, we meet again,", name, "!")For example, if I run this program by typing in at the command line
% ~/Lab1$ python greetings.py
and type in an input of Adam, then the string "Adam" will be stored in the variable name and I should see the following output:
So, we meet again, Adam !
Notice that in the expression:
print("So, we meet again,", name, "!")that we didn't need to add a space before the user's name to the string "So, we meet again,". Instead, Python automatically replaces each separating comma that occurs outside of a string in the print statement with a space. Those commas are used to list all of the things that we want Python to print for us. Since there were two separating commas used here (the first between "So, we meet again," and the variable name, the second between the variable name and "!", a space was automaticaly added before and after the user's name. Of course, that mean's that Python automatically insert a space before the exclamation point... but we'll fix that in our next program, instead.
Fancier Greetings
Next, we will create a program called fancy.py that prompts the user to enter three
strings, one at a time, in the following order: First name, last name, and nickname.
The program should then print "Welcome back, <first name> *<nickname>* <last
name>!" For example, assuming I enter my info correctly, it should print:
Welcome back, Adam *The Eckspert* Eck!
To remove the space before and after the nickname, we will need to include special instructions to the print statement. Recall from our previous program that the print statement automatically converts each separating comma that wasn't part of a string into a space. We can change what each comma is converted into by adding sep="<something>" to the print statement.
For example, the following line of code:
print("I", "have", "spaces")will print:
I have spaces
but if I change that line of code to:
print("I", "have", "spaces", sep="")will print:
Ihavespaces
since sep="" told print to replace each separating comma with an empty string. Likewise, if I use the line of code:
print("I", "have", "spaces", sep="|")will print:
I|have|spaces
Of note: the print statement also automatically prints a special newline character at the end of each print so that two different print statements do not print on the same line of output. We can change that by passing in a special end="<something>" command, just like we did for sep. Then, whatever you put for "<something>" will be automatically printed at the end of the print statement, instead.
Part 4 - Modify a Program
simple.py: 6 points
compounding.py: 6 points
In finance, there are two popular ways of calculating interest earned on savings and/or loans. The difference is in the formula used and how often interest is "earned". In this part of the lab, we will explore both.
Simple Interest
The formula for simple interest earned is

Your goal is to write a program that asks the user for three numbers:
- p: an amount of money to invest in savings
- r: an interest rate you will earn on your savings (paid by the bank for lending them the money)
- t: an amount of time (in years) that you will keep the money in savings
then outputs to user the amount of money they would earn in simple interest. For example, one run of the program might be:
Sample Output
    Welcome to my amazing simple interest prediction program!

    How much would you like to save? 1000
    What is your interest rate? 0.05
    How long are you saving the money? 2

    Your interest earned would be $100.0!
Notes: You will want to "convert" the user inputs into decimal numbers because by default, what the user types is considered a string literal. You can do this by using the built-in Python "float" function float(string-you-want-to-convert-to-a-decimal-number)
p = float(input("How much would you like to save? "))Also, do not worry about rounding your final output to the nearest cent -- it can have as many decimal places as it calculates.
You should test your progam to make sure it's calculating the correct interest amounts. Try a variety of numbers for each input to see if the output matches what you calculate by hand.
Continuously Compounding Interest
A second option for calculating interest is to continuously compounding interest. The formula for this type of interest earned is

This formula awards interest constantly (more often than every second!), rather than at the end of the savings. As you might imagine, this earns a great amount of interest to the saver, so it is rarely used for savings.
Your goal is to copy your simple.py program to a new file called compounding.py and change the formula used to calculate the interest earned to the continuously compounding interest formula. For example, one run of your program might be:
Sample Output
    Welcome to my *even more amazing* continuously compounding interest prediction program!

    How much would you like to save? 1000
    What is your interest rate? 0.05
    How long are you saving the money? 2

    Your interest earned would be $105.17084373602802!
Don't forget to test your program on a variety of values of inputs.
Part 5 - Time Warp
hourconverter.py: 10 points (partner allowed)
In this problem, we'll think about converting units of time. You are allowed and encouraged to work with a single partner on this program (but you are not required to do so, if you prefer to work alone).
Suppose we have some number of hours stored in a variable called hours, which may have a value of 24 or greater. Since we're typically not used to thinking about how long 103 hours is, we might like to improve readability by formatting the time (hours) into days and hours (d and h) such that h < 24. For example, if hours = 103, then we'd like to compute d = 4 and h = 7, since 103 hours is the same as 4 days and 7 hours.
Analyze the Problem:
The problem we are trying to solve is as follows. We want to ask the user for an amount of time in hours and convert it into an easier to understand amount of time.
Determine the SpecificationsInput: get a non-negative integer hours from the user, representing some number of hours.
Output: print the amount of time in hours as the equivalent number of weeks, days, and hours. The number of days should be less than 7 (else the number of weeks should be increased) and the number of hours should be less than 24 (else the number of days should be increased).
For example, if the user enters 103, the output should read
103 hours is equal to 0 weeks, 4 days and 7 hours
Or if the user enters 219, the output should read
219 hours is equal to 1 weeks, 2 days and 3 hours
Notice I'm ignoring grammatical issues such as "weeks" vs. "week" -- please do not worry about being grammatically correct in your output.
Design an Algorithm:
The program has 3 main steps:
- Get the number of hours from the user, store in a variable named hours.
- Calculate the number of weeks (w), days (d), and left over hours
(h) that are in hours, where d < 7 and h < 24.
The mod, or remainder operator (%), as well as the integer division operator
(//) will be particularly useful here.
Integer Division ( // ) and Remainder ( % )
Consider dividing fourteen by four, i.e. (14/4). We'd normally say we 14/4 equals 3.5. But we could also think in terms of "integer division", where we'd say 14/4 equals 3 with a remainder of 2.
In Python a single slash means real division, so 14/4 evaluates to 3.5. A double slash, however, gives the integer component of integer division, and thus 14//4 evaluates to 3. The mod, or remainder operator, is invoked with the percent symbol, and gives whatever value is left over after the integer division. So 14%4 yields 2. More generally, x//y evaluates to the number of times y goes wholly into x, and x%y evaluates to what's left over afterwards. These operations turn out to be surprisingly useful, as we'll now see.
Since this step of the algorithm is a bit more complex than the previous one, we'll break it into three sub-steps, one for each variable that we're calculating.
-
Set h = hours % 24. To see why, note that h should be the number of extra
hours that aren't used up by whole days. That is, h should be whatever
remains after we divide hours by 24 to get days, which is exactly what
hours % 24 means.
-
Set d = ??? (This part is for you to figure out. Before you start programming.)
- Set w = ??? (This part is also for you to figure out. Likewise, before you start programming.)
-
Set h = hours % 24. To see why, note that h should be the number of extra
hours that aren't used up by whole days. That is, h should be whatever
remains after we divide hours by 24 to get days, which is exactly what
hours % 24 means.
- Print the equivalent number of weeks, days, and hours for the user.
Implement a Design:
Create a program called hourconverter.py that implements the design above. An outline of the program is provided in the assignment on repl.it.
Note: to ask the user for a whole number, we want to use the following (similar to how we asked for a decimal number above):
hours = int(input("How many hours have you got? "))
Test the Program:
Test your program by trying a variety of inputs. You can start with the example below, but you should try others as well, especially numbers that you think could be troublesome.
Sample Output
    Welcome to my Hour Converter!

    This program will properly calculate the number of weeks, days, and left over hours from a given number of hours.

    How many hours have you got? 219

    219 hours is equal to 1 weeks, 2 days, and 3 hours
Part 6 - Wrap Up
Google Form: 2 pointsCongratulations! You have now created several Python programs and completed your first programming lab!
In every lab, your last job prior to submission is to complete a brief Google Form. This is a chance to reflect upon what you've learned, and give us some basic feedback. You can find this lab's form at this link.
Please do not forget to fill out the Google Form after each lab, since this is where you will sign the Honor Code for each assignment.
On some labs, there might be an extra question or two for you to answer in the final Google Form. In this lab, you are asked the following question about how you might maintain your hourconverter.py program: Suppose that in ten years the world leaders decide that a week should have 5 days and a day should have 20 hours. What changes would you need to make to your program to make it accurate under the new time rules?
Part 7 - Handin
Finally, all you need to do is submit your solution to the assignment. To do so, please click on the "Submit" button in the top right of your programming environment. This will save all of your programs for myself and the graders to look at. You are welcome and encouraged to submit partial solutions to your assignment -- you can always resubmit by pushing the "Resubmit" button in the top right, which will save the latest version of your programs. We will only grade the latest version that you submitted. By submitting multiple times, you avoid accidentially forgetting to turn in any completed part of your assignment, especially in case you become busy around the lab due date.